Friday, October 30, 2009

Ability to Enable/Disable DISTINCT and ORDER BY Clause in OBIEE at Report Level

There was a requirement from my customer to be able to Configure OBIEE at the report level such that the 'DISTINCT' and 'ORDER BY ' clause added by the OBIEE generated query on dimensional attributes can be gotten rid of when desired .

One of the Reason why we wanted to have this feature in our Dashboard was PERFORMANCE . Some of the queries were taking awfully long time to fetch data because of 'DISTINCT' and 'ORDER BY ' clause.

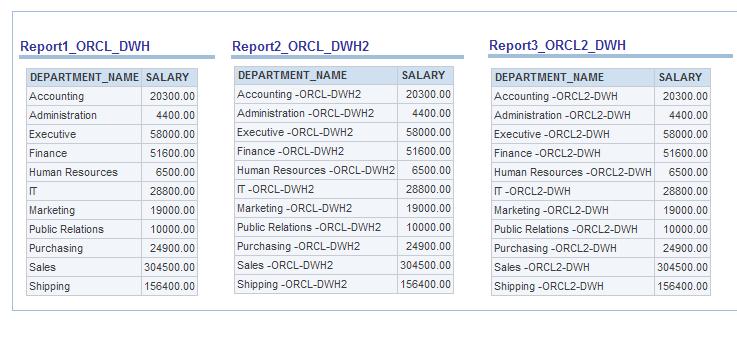
Let us first have a look at what I am trying to achieve and then I will explain the configuration steps.
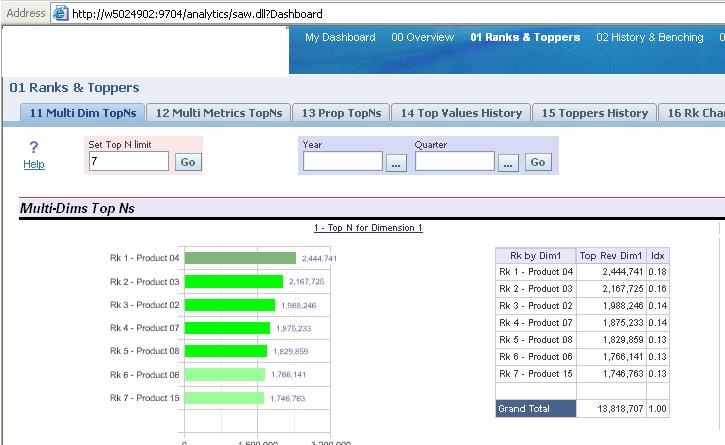
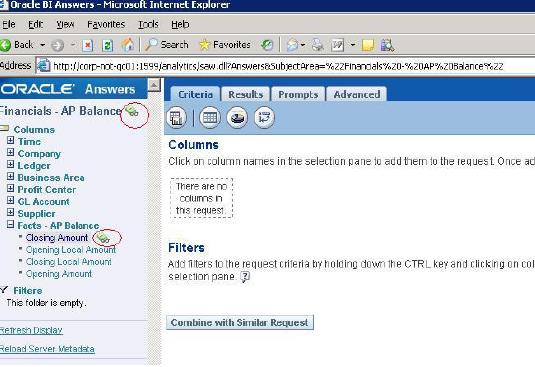
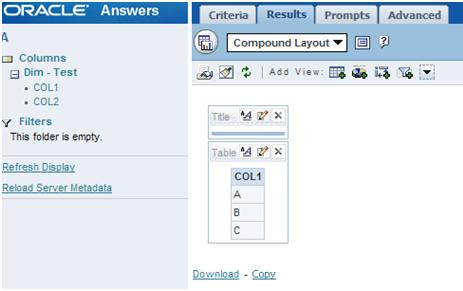
The screenshot below shows a simple adhoc request sent to OBIEE by selecting COL1

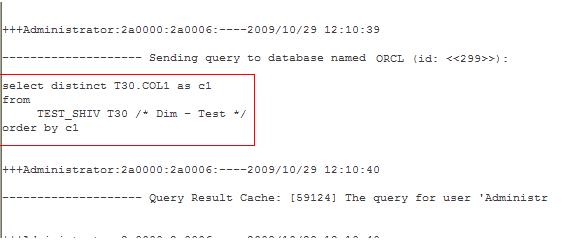
Analyzing the Query generated by OBIEE shows that DISTINCT and ORDER BY clause was added.

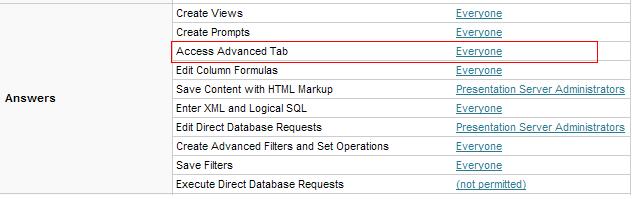
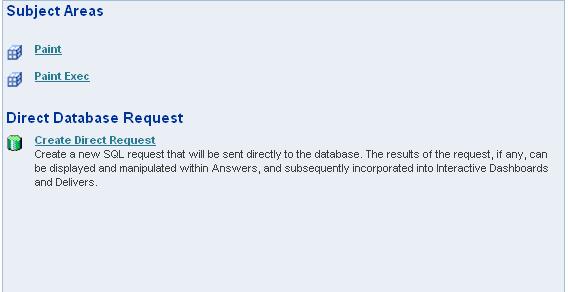
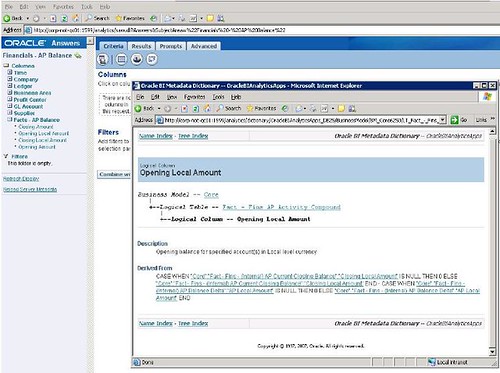
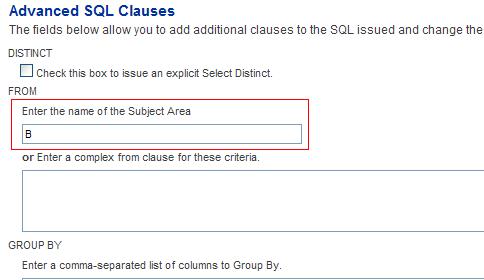
Now let us say if we would like to get rid of 'DISTINCT' and 'ORDER BY ' clause in this particular report query all that I am going to do is navigate to the Reports Advanced Tab and change the Value of the Subject Area from 'A' to 'B' as you can see below .

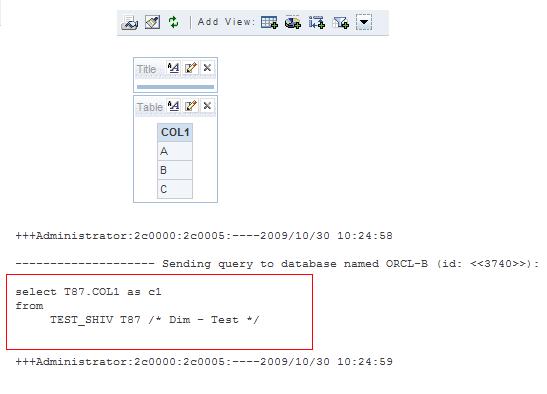
Let us re-run the same report and analyze the query . As you can notice below the 'DISTINCT' and 'ORDER BY ' clause has been removed for this particular query .

Let us now look into the steps to achieve this
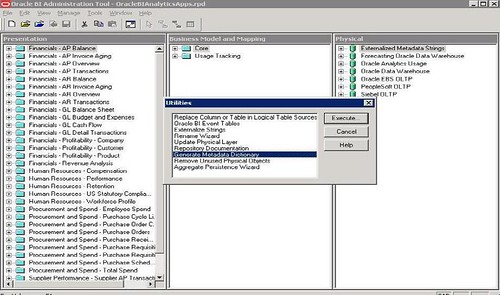
1.Within the OBIEE Physical Layer>Database Features by default the value of 'DISTINCT_SUPPORTED ' is checked .

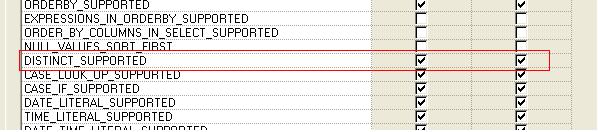
2.Unchecking 'DISTINCT_SUPPORTED' feature will ensure that all the queries that uses the Connection Pool defined within this Database to remove 'DISTINCT' and 'ORDER_BY' clause . But the requirement is to be able to change for any selected report .
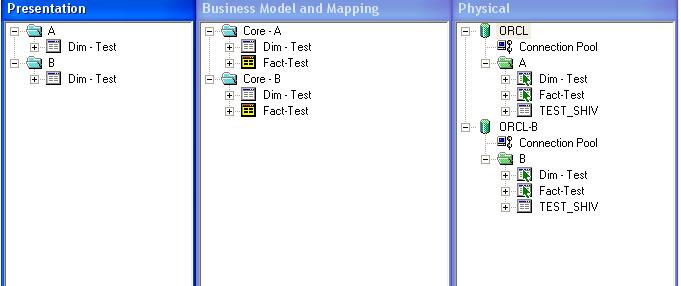
3.So I Copied all the three layers of the Metadata within the existing RPD as you can see below.The Only difference between the two are that 'DISTINCT_SUPPORTED' feature in one(B) has been turned off and they are named differently in all the three layers as you can see below.

4.To Summarize the steps . For the Subject area within which you want to be able to Enable/Disable the addition of 'DISTINCT' and 'ORDER BY ' clause .
i.Append all the three layers to the existing RPD with a different name.
ii.Uncheck the 'DISTINCT_SUPPORTED' feature for one of the Physical Datbase connection.
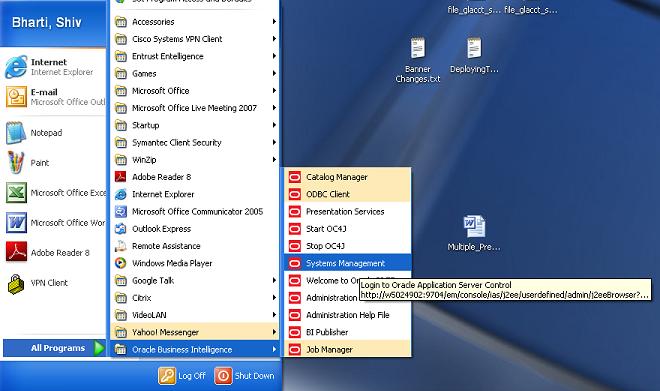
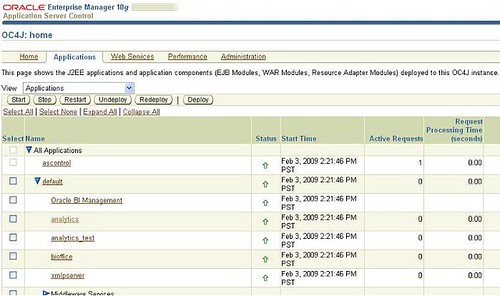
iii.Restart your Oracle BI Server .
iv.Go to the Reports Advanced Tab and Change the Subject Area name to point to 'A' or 'B' in order to Enable/Disable the 'DISTINCT_SUPPORTED' feature for the Report.

Saturday, October 17, 2009

Switching Report Data Source Name(DSN) or User Name from OBIEE Dashboards/Answers

One of My Customer had a requirement to come up with a design which would allow the OBIEE Admistrator to switch report Data source Name(DSN) from the Answers . Let us say currently a report is coming from a DSN = ORCL now if the Administrator would like to change the source to a new DSN = ORCL2 the administrator should be able to do so from the OBIEE Answers. To give you a brief background behind this requirement , When we went live all the realtime(near realtime to be precise) reports were pointed to a data source which was planned to be refreshed nightly .Therefore we wanted to be able to come up with a design where in we could easily point a report to the live production instance for selected reports if the Business users could justify the need for it to be realtime.

We will first see what I am trying to achieve and then explain you the steps .
The Below report is being sourced from a Data Source Name(DSN)= 'ORCL' .

Now if you would like to source the same report from a different Data Source let's Say 'ORCL2' we can do so by adding just one Prefix statment by going to the Reports>Advance tab.
SET VARIABLE OLAP_DSN = 'ORCL2'

After applying the above statment the Report now sources from a DSN=ORCL2 as you can see below .

Let us now look into the steps to achieve this
1. I created three Different Data Sources and ran the script to create two tables Department and Employees.You can download the script and the RPD from the link below.
Download
ORCL>DWH: Data Source(Database)=ORCL,Schema(User)=DWH
ORCL>DWH2:Data Source(Database)=ORCL,Schema(User)=DWH2
ORCL2>DWH:Data Source(Database)=ORCL2,Schema(User)=DWH


Make sure that you keep the Same Password for all the three different schemas above.
2. As you can see in the RPD I just imported the two Tables established the Join in the Physical Layer and Dragged/Dropped the Folder all the way to the Presentation Layer.Then I set the Aggregation as Sum For Employees>Salary.
3.We then need to create a Session Initialization Block as below with two variables.
SELECT 'ORCL' OLAP_DSN , 'DWH' OLAP_USER FROM DUAL

4.Variable OLAP_DSN . Make sure that 'Enable any user to set the value' is checked.

5.Variable OLAP_USER.

6.Now let us Modify the Connection Pool to use the Session Variables.
VALUEOF(NQ_SESSION.OLAP_DSN)
VALUEOF(NQ_SESSION.OLAP_USER)

7. Let us now create three Reports.
Report1_ORCL_DWH

Report2_ORCL_DWH2
Go to the Advanced Tab>Prefix and add the below script
SET VARIABLE OLAP_USER = 'DWH2';

Report3_ORCL2_DWH
Go to the Advanced Tab>Prefix and add the below script
SET VARIABLE OLAP_DSN = 'ORCL2';


7.As you can see below the reports are coming from three different Data Sources in a Single Dashboard Page.

8. The Administrator can now Navigate to Administration>Manage Privileges>Answers:Access Advanced Tab and grant privileges to the group who is allowed to add the script in the Reports Advanced Tab.

Monday, October 12, 2009

How to host Multiple RPD and Multiple Presentation Services in OBIEE within the Same Windows Box

Article Summary: Host Multiple RPD/Presentation Services in OBIEE within the Same windows box i.e setup OBIEE Development/QA instance in the same machine .

1.Navigate to Oracle Business Intelligence>System Management


2. Give th 'oc4jadmin' password . This is the password that you give while installing OBIEE , In this case I gave the password as 'oc4jadmin'.


3. Once you are logged in Navigate to Applications Tab and Click on Deploy.


4. Now browse to the arhive location >\OracleBI\Web\analytics.war . Leave other default settings and click on next.


5 . You should see the below screen.


6 .Set the following values
Application Name: analytics2
Context Root: analytics2 and then click on Next


7. Click on Deploy.


8. You should see the deployment starting as below.


9. Once the Deployment is completed the below screen will appear .


10.At this point the new presentation service analytics2 is available.
http://machinename:9704/analytics/
http://machinename:9704/analytics2/
Both the Presentation Services are currently pointing to the same Dashboard/Webcat and instanceconfig file.


11. The below screen shows that I am now connecting to the new Presentation Services 'analytics2'

http://machinename:9704/analytics2/saw.dll?Dashboard


12.Now we will create a new catalog for the analytics2 presentation services.
>Copy the directory OracleBIData\web\catalog to OracleBIData\web\catalog_test. Now the new catalog-directory is ready to use and should be entered in the configuration file ( instanceconfig.xml).


13. Now we have created the new presentation service and the catalog for this service we have to change/create the configuration files. The default configuration file (instanceconfig.xml) tells us which listener-port, catalog and which presentation service will be used.
14. Make a copy of the original instanceconfig.xml and name this file instanceconfig_9710.xml. Also make a second copy of the original file and name this file instanceconfig_9712.xml
Edit the instanceconfig_9710.xml file as below
15.[ServerInstance]
[DSN]AnalyticsWeb1[DSN]
[CatalogPath]C:/OracleBIData/webcatalog/samplesales [CatalogPath]

Edit the instanceconfig_9712.xml file as below
[ServerInstance]
[DSN]AnalyticsWeb2[DSN]
[Listener port="9712"]
[CatalogPath]C: OracleBIDatawebcatalog_testpaint[CatalogPath]

16. Navigate to C:\OracleBI\oc4j_bi\j2ee\home\applications\analytics2\analytics\WEB-INF
And edit the file web.xml and modify the port number to 9712.
[param-name]oracle.bi.presentation.sawserver.Port[param-name]
[param-value]9712[param-value]

17. Create two batch files OBIEE1.bat and OBIEE2.bat
OBIEE1.bat = sawserver.exe -c C:\OBI2\OracleBIData\web\config\instanceconfig_9710.xml

18. OBIEE2.bat = sawserver.exe -c C:\OBI2\OracleBIData\web\config\instanceconfig_9712.xml
19. Modify the Config file to host two host two different RPD C:\OracleBI\server\Config and Edit the file NQSConfig.INI
[ REPOSITORY ]
Star = samplesales.rpd,DEFAULT;
Star2 = paint.rpd ;

20. Create two ODBC connections
AnalyticsWeb1


21.


22.


23.


24. AnalyticsWeb2


25.


26.->Restart the OBIEE Server .
->Stop the OBIEE presentation Services.
->Click on both the batch files . The two OBIEE Presentation services will have their respective Webcatalog and their Respective RPD all hosted in the Same Windows Box .


27.


28.


29.

Saturday, October 10, 2009

Setting Up OBIEE Metadata Dictionary

1.Open the RPD>Tools>Utilities>Generate Metadata Dictionary>Execute.

2.Browse to a location where you would like to save the
metadata dictionary.

3.You will see a message informing you that the metadata
dictionary has been succesfully created .

4.Now we need to tell the presentation server where to find the
dictionary. Navigate to OracleBIData\Web\Config and open the
file 'instanceconfig.xml'
Add


5.Navigate to C:\OracleBI\oc4j_bi\j2ee\home\applications\analytics\analytics and
create a folder 'dictionary' and copy and paste the metadata dictionary folder 'OracleBIAnalyticsApps' inside this folder.

6.Restart the following
Oracle BI Server
Oracle BI Presentation Services
Oracle BI Java Host
7. When you scroll by any column you should be able to see the
definition of the column. You can also click on the green icon to
see futher details specific to that column.